Getting the Planter Ready for Spring
March 3, 2025
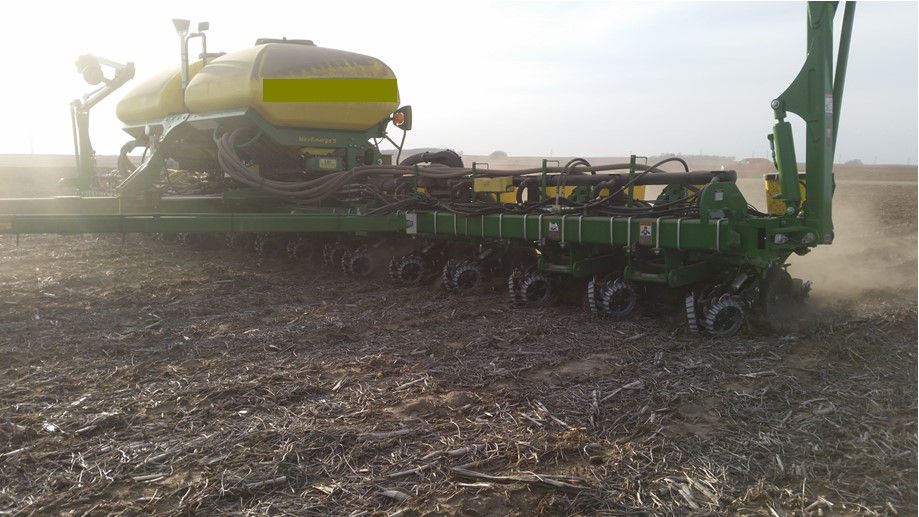
As spring approaches, ensuring your planter is optimized for planting is crucial for helping to maximize yield potential. Uneven plant emergence and spacing can result in yield losses of 7 to 15 bu/acre in corn.1 In soybean, it can be more difficult to quantify yield losses due to uneven stand establishment and the plants’ ability to compensate for space, but generally delayed emergence is related to a decrease in yield.2 Keeping a well-maintained planter can help ensure even spacing, proper seed depth, and good seed to soil contact (Figure 1). Each factor plays a major role in uniform stand establishment and helps set those plants up for success during the growing season. The following information highlights some key components of a planter, but it is recommended to refer to your planter’s specific operator manual for more precise instructions.
1. Clean and Inspect the Planter:
Remove Debris: Start by cleaning out any leftover seeds in the seed box or hopper and remove dirt, chaff, or other residues from the previous season. Use compressed air if necessary to clear out hard-to-reach areas.
Check for Damage: Inspect all parts for wear or damage. Look for cracks, rust, or broken components in the frame, row units, and seed hoppers.
2. Lubricate Moving Parts:
Bearings and Chains: Apply lubricant to all bearings, chains, and sprockets. This reduces friction and wear and helps ensure smooth operation and even seed spacing.
3. Adjust Seed Metering Systems:
Calibration: Check the seed metering system by running a calibration test. Adjust the metering plates, discs, or fingers to help ensure desired seed spacing and seeding rate.
Clean Metering Mechanism: Clean the mechanism to avoid any blockages, which could lead to inconsistent seed placement.
4. Check Seed Tubes and Seed Furrow Implements:
Tube Integrity: Inspect seed tubes for any cracks or wear that could affect seed drop accuracy. Replace if necessary.
Seed Firmer: Check seed firmers for wear and clean any blockages that may inhibit flow of a liquid in-furrow system. Worn seed firmers can reduce seed to soil contact and negatively impact germination.
Row Cleaners: Match row cleaners to tillage style for best performance and evaluate movement. Removing residue and preparing the soil for the seed furrow is a critical step for proper seed to soil contact.
Openers: Look at the disc openers for sharpness and wear. Dull or uneven openers can lead to poor seed placement. Replace or sharpen as needed.
5. Verify Depth Control and Closing Wheels:
Parallel Arm Linkage: Evaluate parallel arm movement and components to help ensure a smooth ride throughout the field. Excess movement can result in inconsistent seed depths.
Gauge Wheel: Check gauge wheel movement in the arm and wheel integrity. The gauge wheels should be properly shimmed to form a tight seal with the disc openers to help maintain soil moisture conditions. Replace or adjust as necessary.
Closing Wheels: Evaluate for proper alignment, distance, and pressure. Calibrated closing wheels closes the furrow around the seed providing good seed to soil contact. Readjust and replace worn parts as necessary.
Test in Soil: If possible, do a test run in the field to check that the depth control is functioning correctly.
6. Test the Drive System:
Drive Chains: Check that all drive chains are tight and well-lubricated. Loose chains can lead to erratic planter performance.
Electronic Sensors: If your planter uses electronic sensors for monitoring, test these for accuracy in seed placement and population.
7. Hydraulic and Pneumatic Systems:
Leaks and Pressure: Check all hydraulic hoses and connections for leaks. Verify that pneumatic systems are maintaining correct pressure for seed delivery.
8. General Items:
Level Toolbar: Check that the toolbar is level, this is a critical step to allow for all other components of the planter to be engaged properly. Note, it is recommended to check the level in the field as results may vary from the shop.
Tractor Tire Pressure: Evenly inflated tires can help reduce chances of having planter leveling issues in the field.
Tractor Ballast: If a new fertilizer tanks or additions have been made to the planter be sure to adjust for the change in weight on the tractor ballast.
Pre-Planting Test: Before you hit the field, conduct a final test run to ensure everything is working in harmony. Check seed spacing, depth, and singulation.
Safety: Make sure all safety features are intact or repaired, including lights, mirrors, and guards.
9. Documentation:
Service Records: Keep a record of all maintenance and adjustments made. This helps in planning for future maintenance and can be useful for troubleshooting.
These steps provide high-level reminders and should be used in conjunction with the manufacturer’s operating manual for best results prior to the planting season. A well-maintained planter can extend the life of the equipment and help ensure even stand establishment. Through even spacing, consistent seed depth, and good seed to soil contact, crops have a better potential for a strong start and increased yield.
Channel Agronomist
Sam Park
Sources
1Nielsen, R. L. 1997. Stand establishment variability in corn. Department of Agronomy, Purdue University. www.agry.purdue.edu/ext/corn/pubs/agry9101.htm#:~:text=Summary,spacing%20or%20uneven%20seedling%20emergence.
2Masino, A., Rugeroni, P., Borrás, L., and Rotundo, J.L. 2018. Spatial and temporal plant-to-plant variability effects on soybean yield. European Journal of Agronomy. ScienceDirect®. ELSEVIER. https://doi.org/10.1016/j.eja.2018.02.006.
Web sources verified 1/15/25 1110_508300
Disclaimer
ALWAYS READ AND FOLLOW GRAIN MARKETING AND ALL OTHER STEWARDSHIP PRACTICES AND PESTICIDE LABEL DIRECTIONS.